
Where to go
Appointments → Availability
Before you start
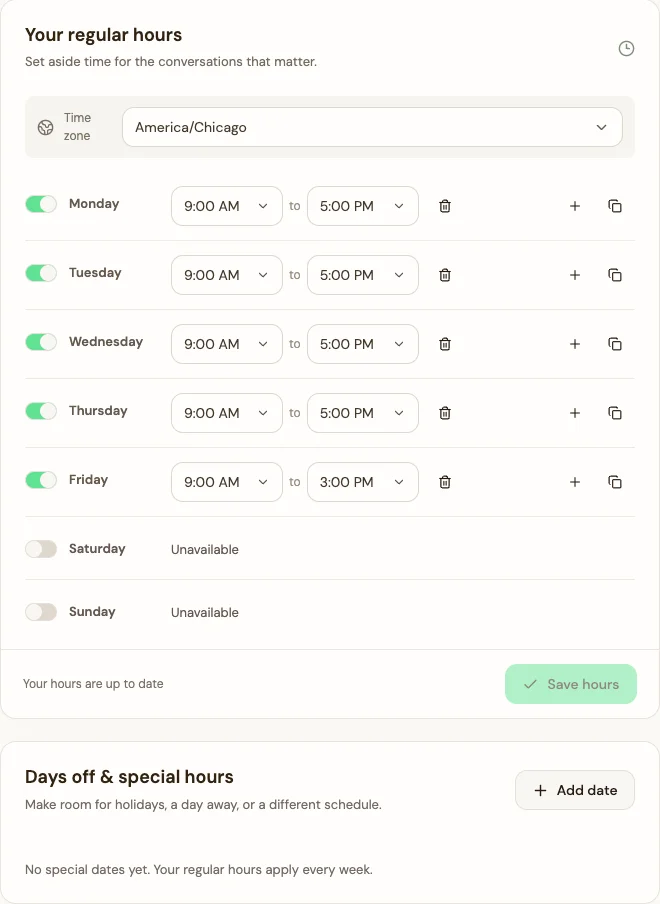
Check your scheduling time zone before choosing your weekly hours. These hours apply to all appointment options.
Step by step
-
Choose the Time zone for your scheduling calendar.
-
Turn on each day you accept appointments and set the start and end time. Turn off days when you are unavailable.
-
Add a second time interval if you need a break, such as 9:00–12:00 and 13:00–17:00. Use the copy control when several weekdays share the same hours.
-
Choose Save hours. If the times are rejected, check that each end time comes after its start and intervals do not overlap.
-
In Days off & special hours, choose Add date. Mark that date unavailable or give it different hours, then save.
-
Preview an active appointment option and check that the intended dates and times are offered.
See the steps
Use these views to find the controls as you follow the guide.
What happens next
Your saved weekly hours and date exceptions shape the available appointment slots.
Helpful tips
-
Your account’s 12/24-hour display preference is separate from the scheduling time zone.
-
An active appointment option still needs available hours.
-
Review Connected calendars if you use a calendar alongside Waltz. Check its connection status and preview your booking times after updating your schedule.