
Where to go
Appointments → Appointment options → Create appointment option
Before you start
Use a paid plan. An appointment option defines what can be booked; Availability defines when it can be booked.
Step by step
-
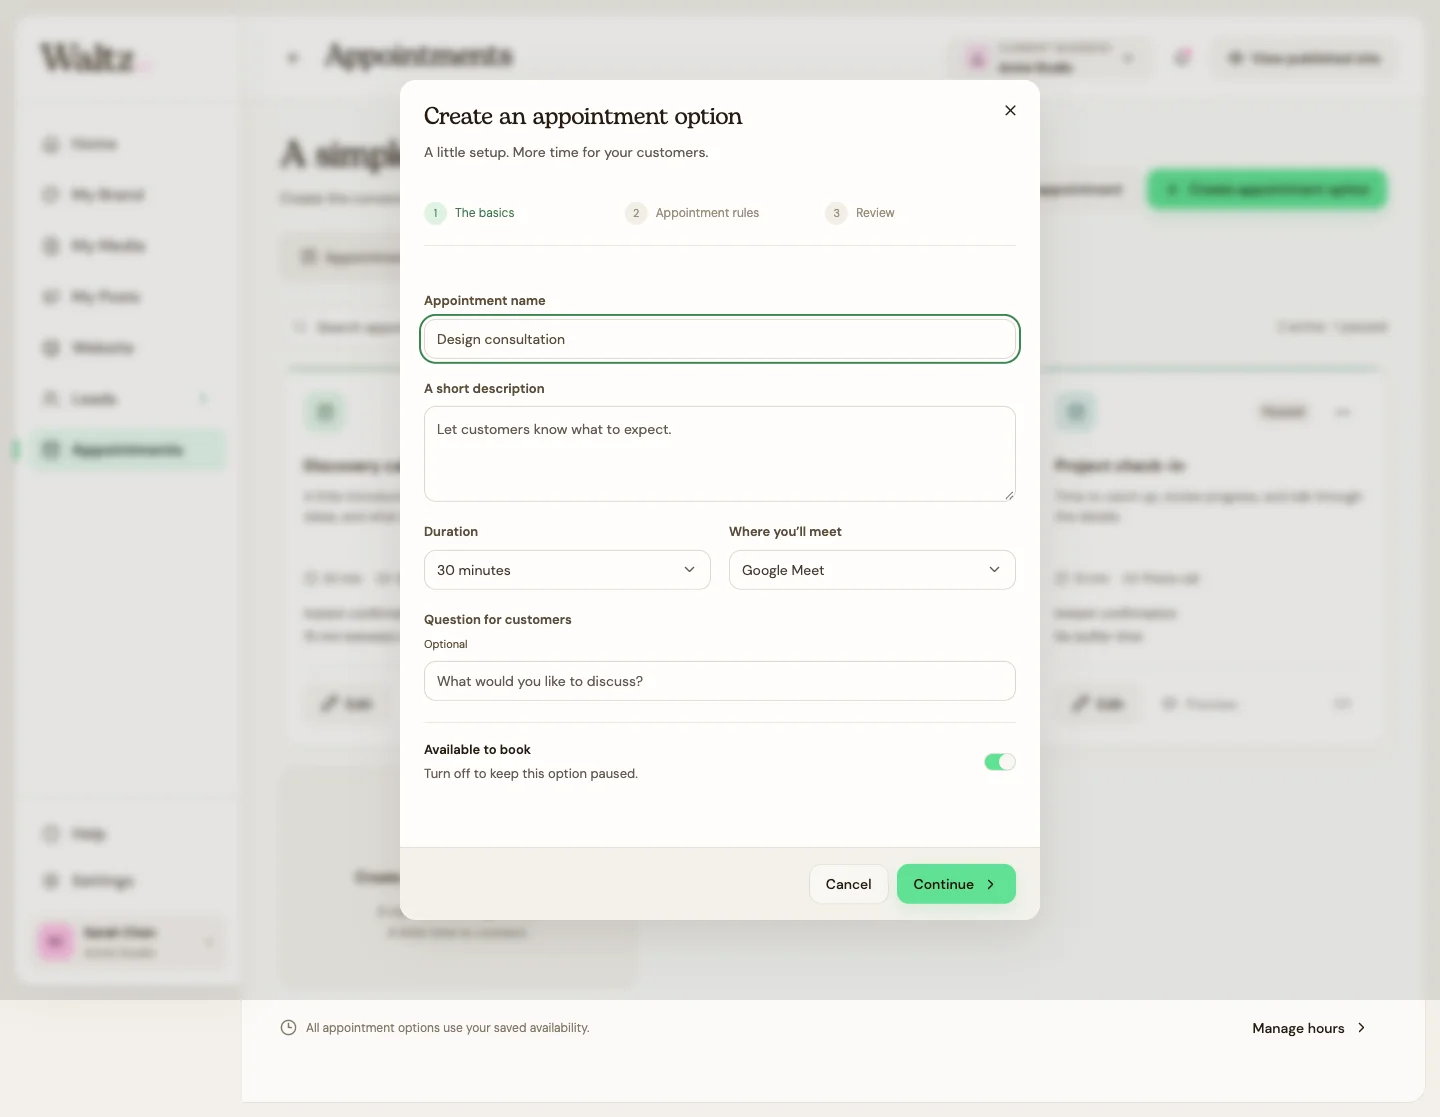
Enter an Appointment name and short description. Example: “Design consultation — tell us about your space and what you want to change.”
-
Choose the Duration and Where you’ll meet: Google Meet, Zoom, Phone call, or In person. Add an optional question for customers.
-
Leave Available to book on to make this option active, or turn it off while you prepare it. Choose Continue.
-
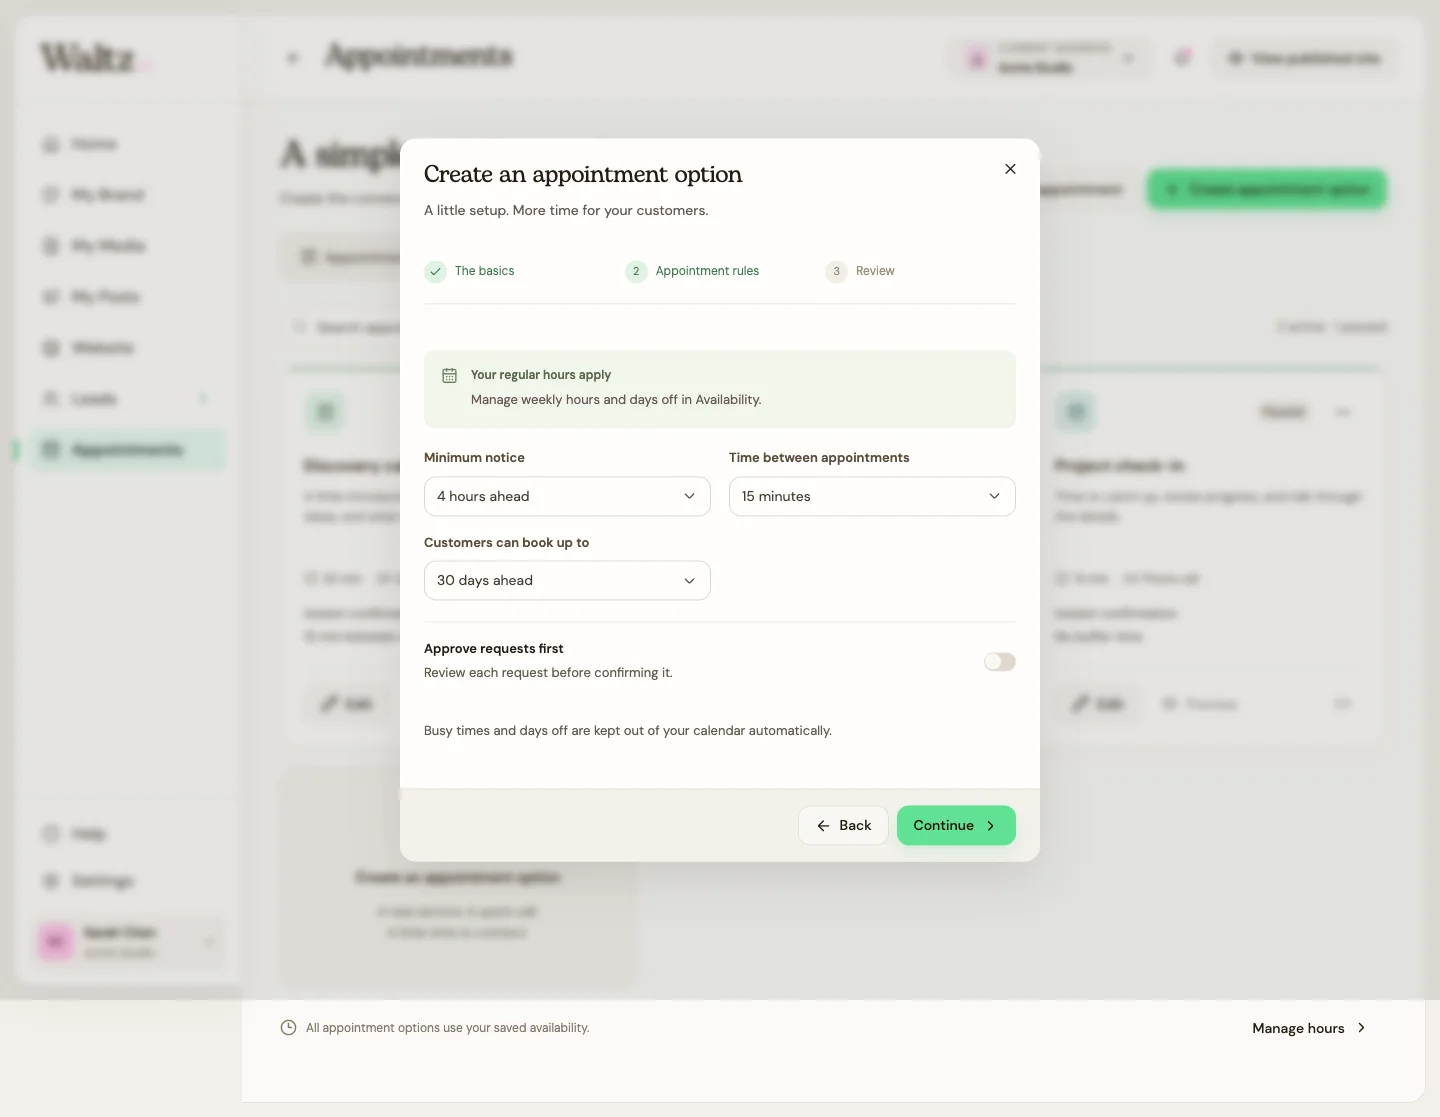
Set Minimum notice, Time between appointments, and how many days ahead customers can book.
-
Turn on Approve requests first if you want to review each request before confirming it. Continue to Review.
-
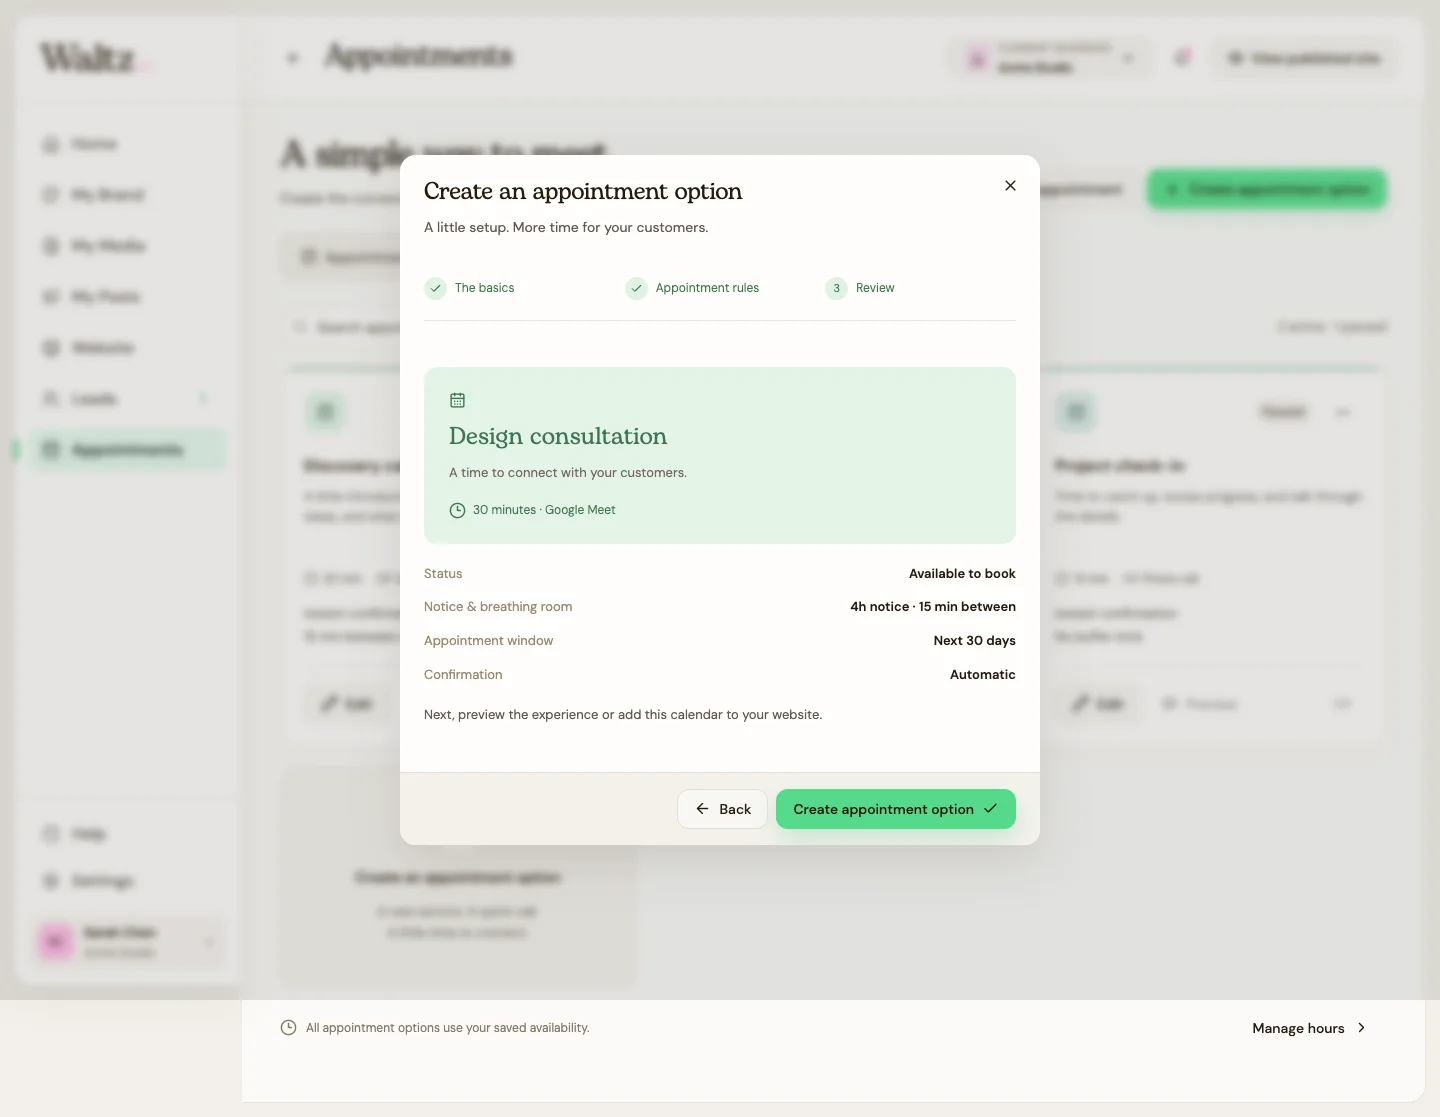
Read the summary and choose Create appointment option. Then set your available hours and preview the calendar.
See the steps
Use these views to find the controls as you follow the guide.
What happens next
Your option appears in Appointment options with its duration, meeting choice, and booking rules.
Helpful tips
-
Minimum notice prevents last-minute bookings; time between appointments gives you a break.
-
Pausing an option stops new bookings without deleting appointment history.
-
For online appointments, review the meeting details and make sure your customer has the information needed to join.