
Where to go
Appointments → Appointments
Before you start
Use a paid plan to manage appointments. Pending requests need your approval; confirmed appointments are already accepted.
Step by step
-
Use Upcoming, Pending, Past, or Cancelled to find the appointment. Switch between list and calendar views if helpful.
-
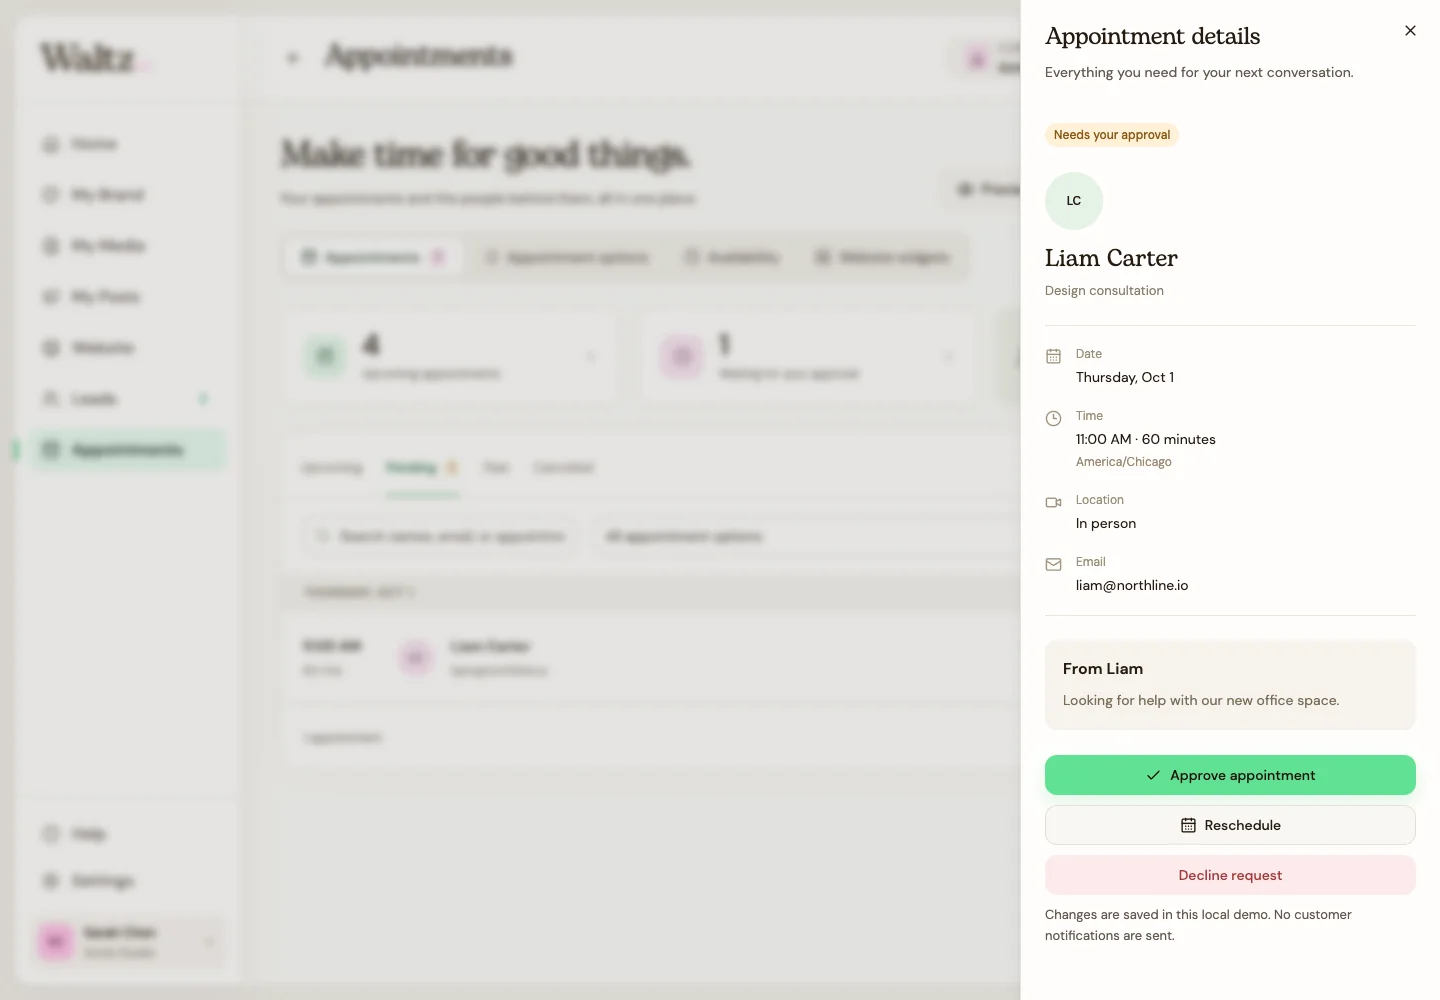
Open the appointment and review the customer, option, date, time, duration, location, and notes.
-
For a pending request, choose Approve appointment to accept it, or Decline request and review the confirmation.
-
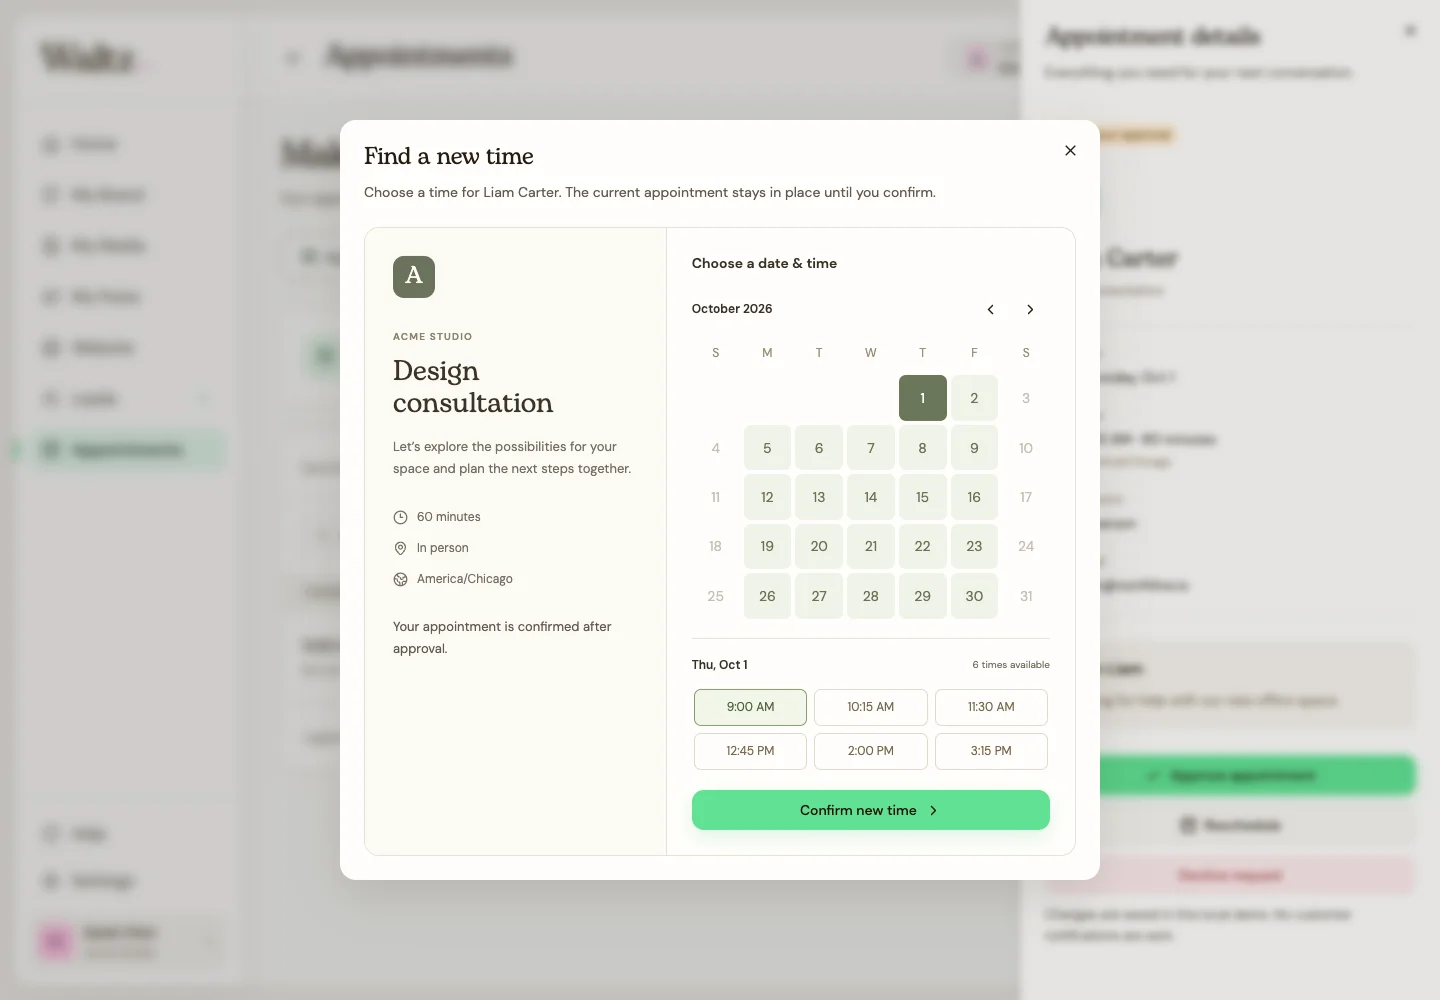
To move a pending or confirmed appointment, choose Reschedule, select an available new date and time, and save the change.
-
To cancel a confirmed appointment, choose Cancel appointment and read the confirmation. The record moves to Cancelled.
-
For an eligible past confirmed appointment, use the completion action when the meeting is finished.
See the steps
Use these views to find the controls as you follow the guide.
What happens next
The appointment shows the status or new time you selected.
Helpful tips
-
Check the scheduling time zone when agreeing on a new time with a customer.
-
After changing an appointment, review its details and make sure the customer knows the new time or cancellation. Your notification preferences control updates to you.