
Where to go
Leads → My Forms → Create form
Before you start
Choose the information you need. Forms require at least one contact method: Email, Phone number, or WhatsApp number. Management requires a paid plan.
Step by step
-
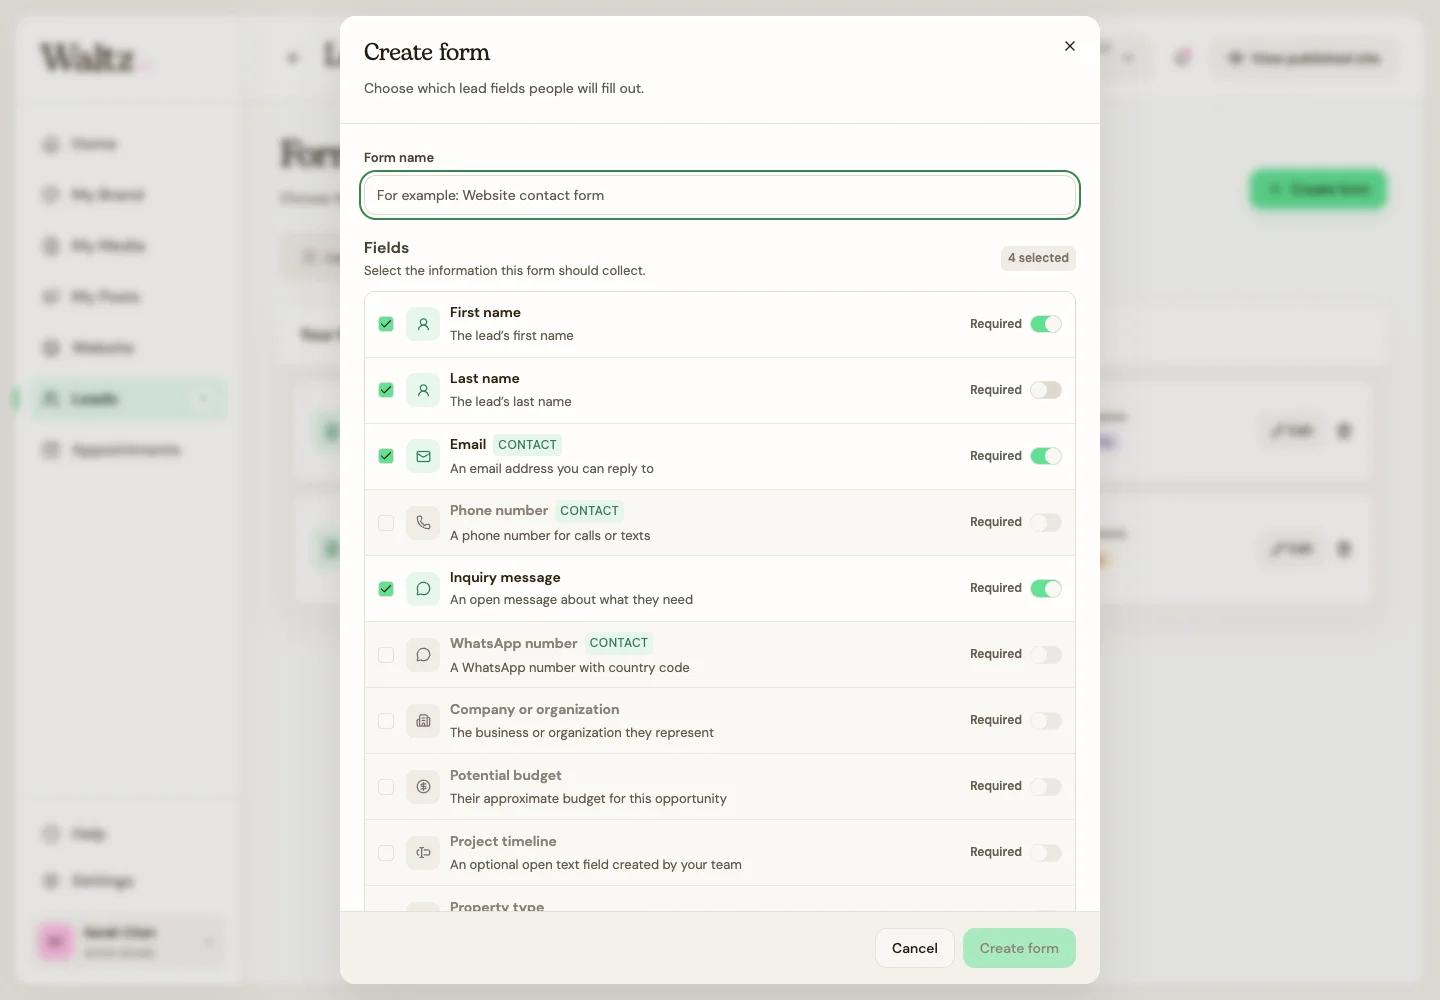
Choose Create form and give it a clear name for your library, such as “Project inquiry.”
-
Include the fields you want customers to see. For a simple start, choose a name, Email, and Inquiry message.
-
Use the Required switch beside a field only when you need an answer before following up.
-
Include at least one contact method. If you have created labels, choose an Automatic label so leads from this form are easy to recognize.
-
Choose Create form. To change it later, open it in My Forms and save your changes.
-
Continue with Add your form to a website page. Saving a form in your library does not place it on your website.
See the steps
Use these views to find the controls as you follow the guide.
What happens next
A saved form appears in My Forms and is available to choose in the website editor.
Helpful tips
-
Keep the first form short. Ask for information you will actually use to reply.
-
Deleting a form from the library does not delete existing leads.