
Where to go
Leads → Fields & Labels
Before you start
Use labels for groups and custom fields for extra information.
Step by step
-
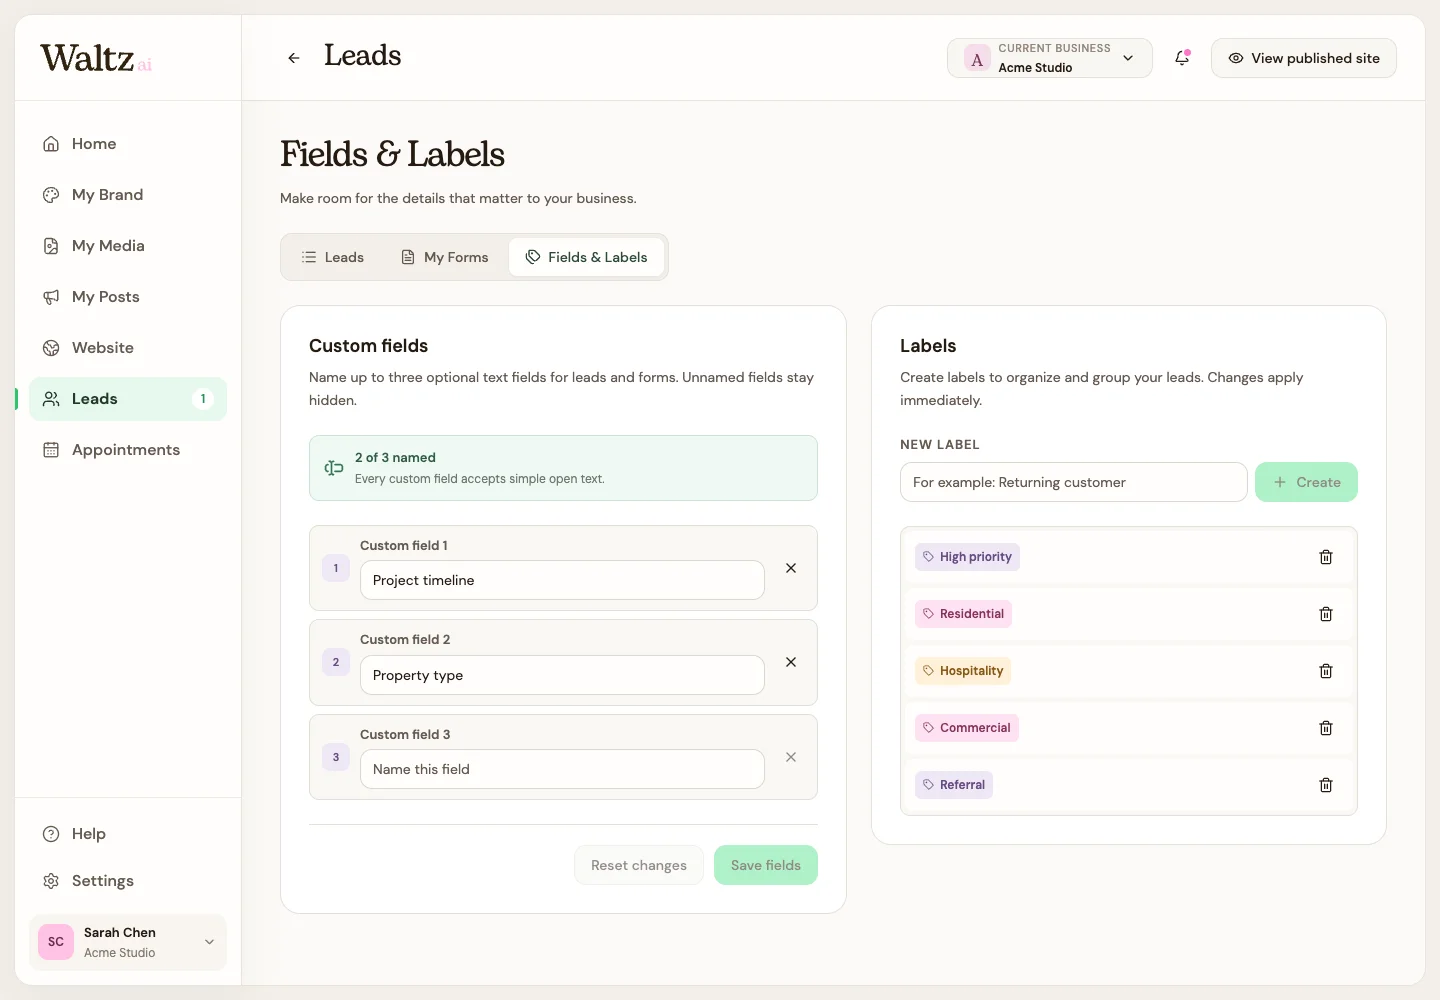
In Labels, enter a useful name, such as “Returning customer” or “Service inquiry,” then choose Create.
-
Apply the label to a lead in its detail panel, or select several leads and use the bulk label action.
-
For automatic organization, add the label to a saved form. New leads from that form receive it.
-
In Custom fields, name up to three optional text fields. For example, “Preferred start date” or “Project location.” Choose Save fields.
-
Add those named fields to a form when you want to ask visitors for that information. Fill them directly in a lead when needed.
See the steps
Use these views to find the controls as you follow the guide.
What happens next
Your leads can be grouped and carry up to three extra named text fields.
Helpful tips
-
Custom fields accept open text. Naming one “Preferred date” does not make it a date picker.
-
Unnamed custom fields stay hidden. Removing a label removes it from every lead, so review the action first.