
Where to go
Leads → Leads
Before you start
A lead is someone who has shown interest in your business. You can also use Create lead to add a contact manually on a paid plan.
Step by step
-
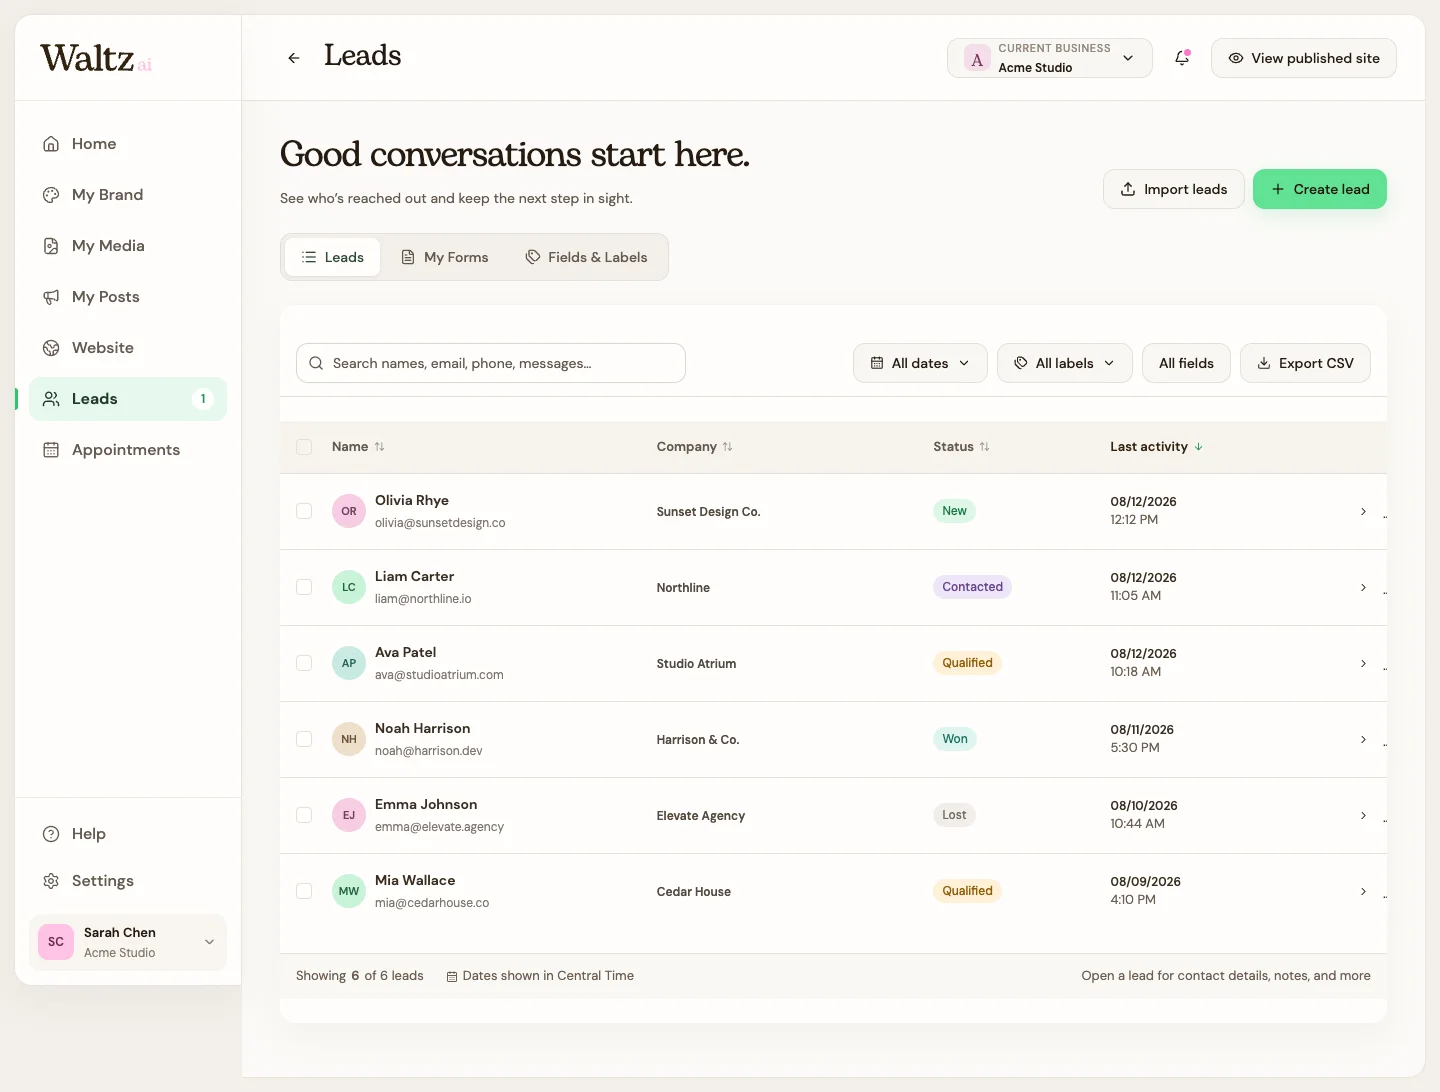
Find the lead by name or search for an email, phone number, or message. Use the date, label, and field filters to narrow the list.
-
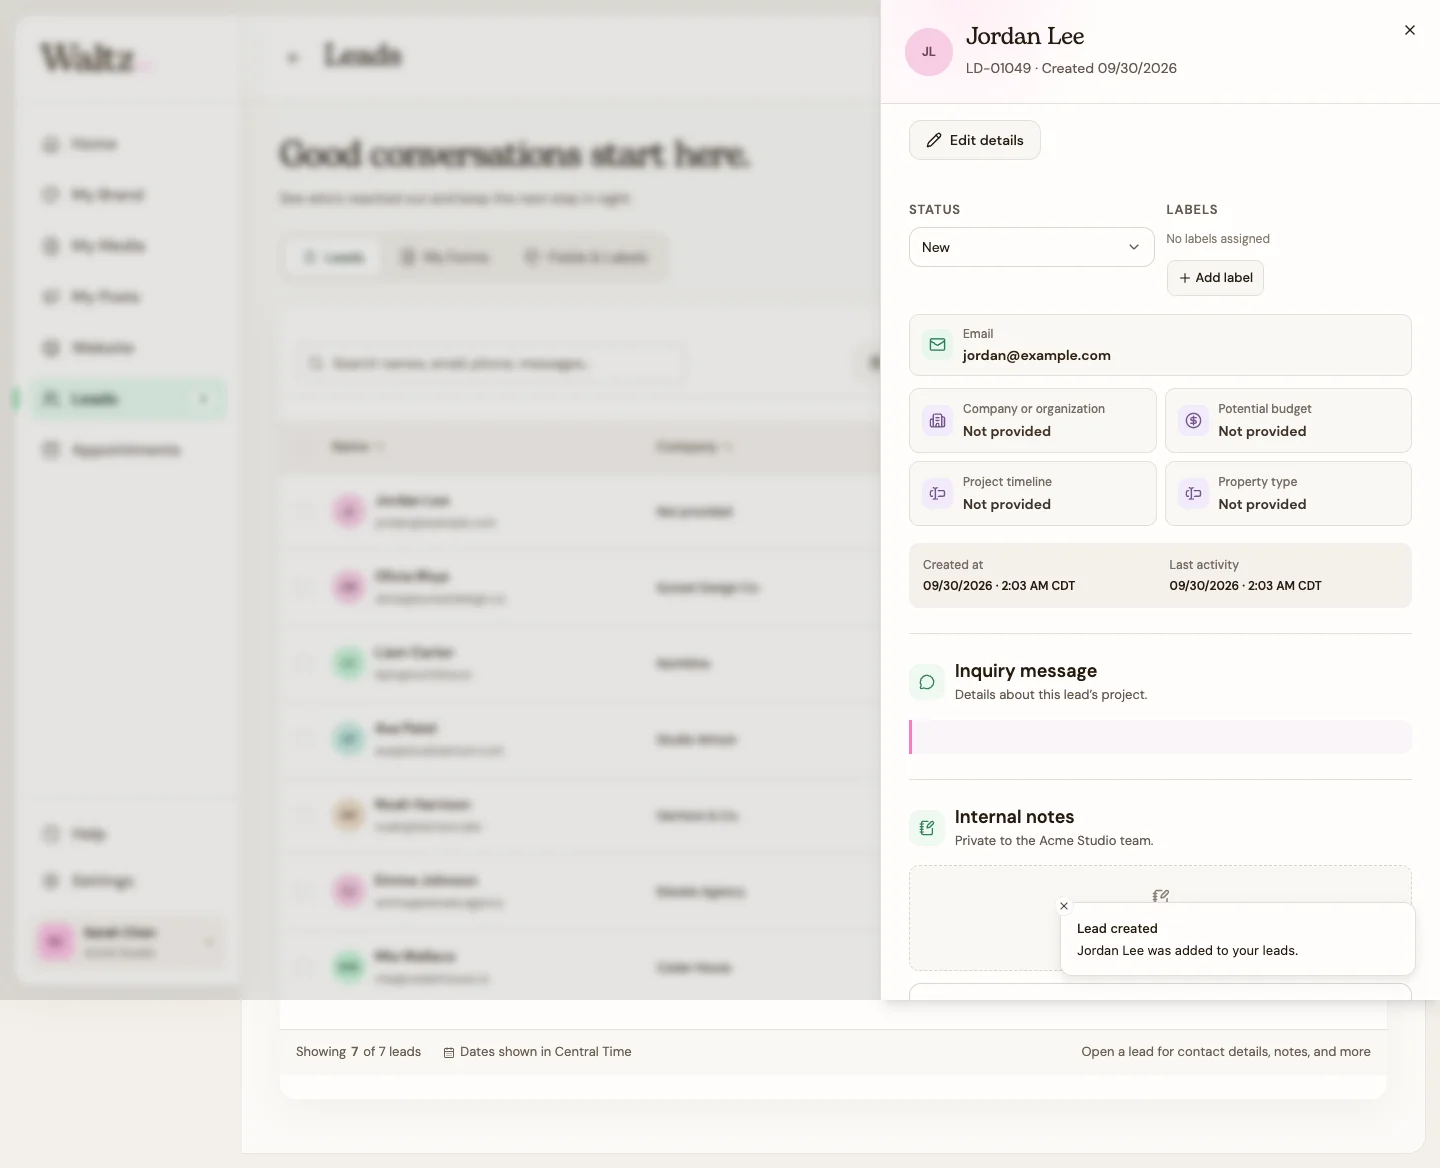
Open the lead to review contact details, the inquiry, budget, labels, and any custom fields.
-
Choose the available email, phone, or WhatsApp action to open that contact method. Check the recipient before sending your reply in the external app.
-
Update the status as the conversation progresses: New, Contacted, Qualified, Won, or Lost.
-
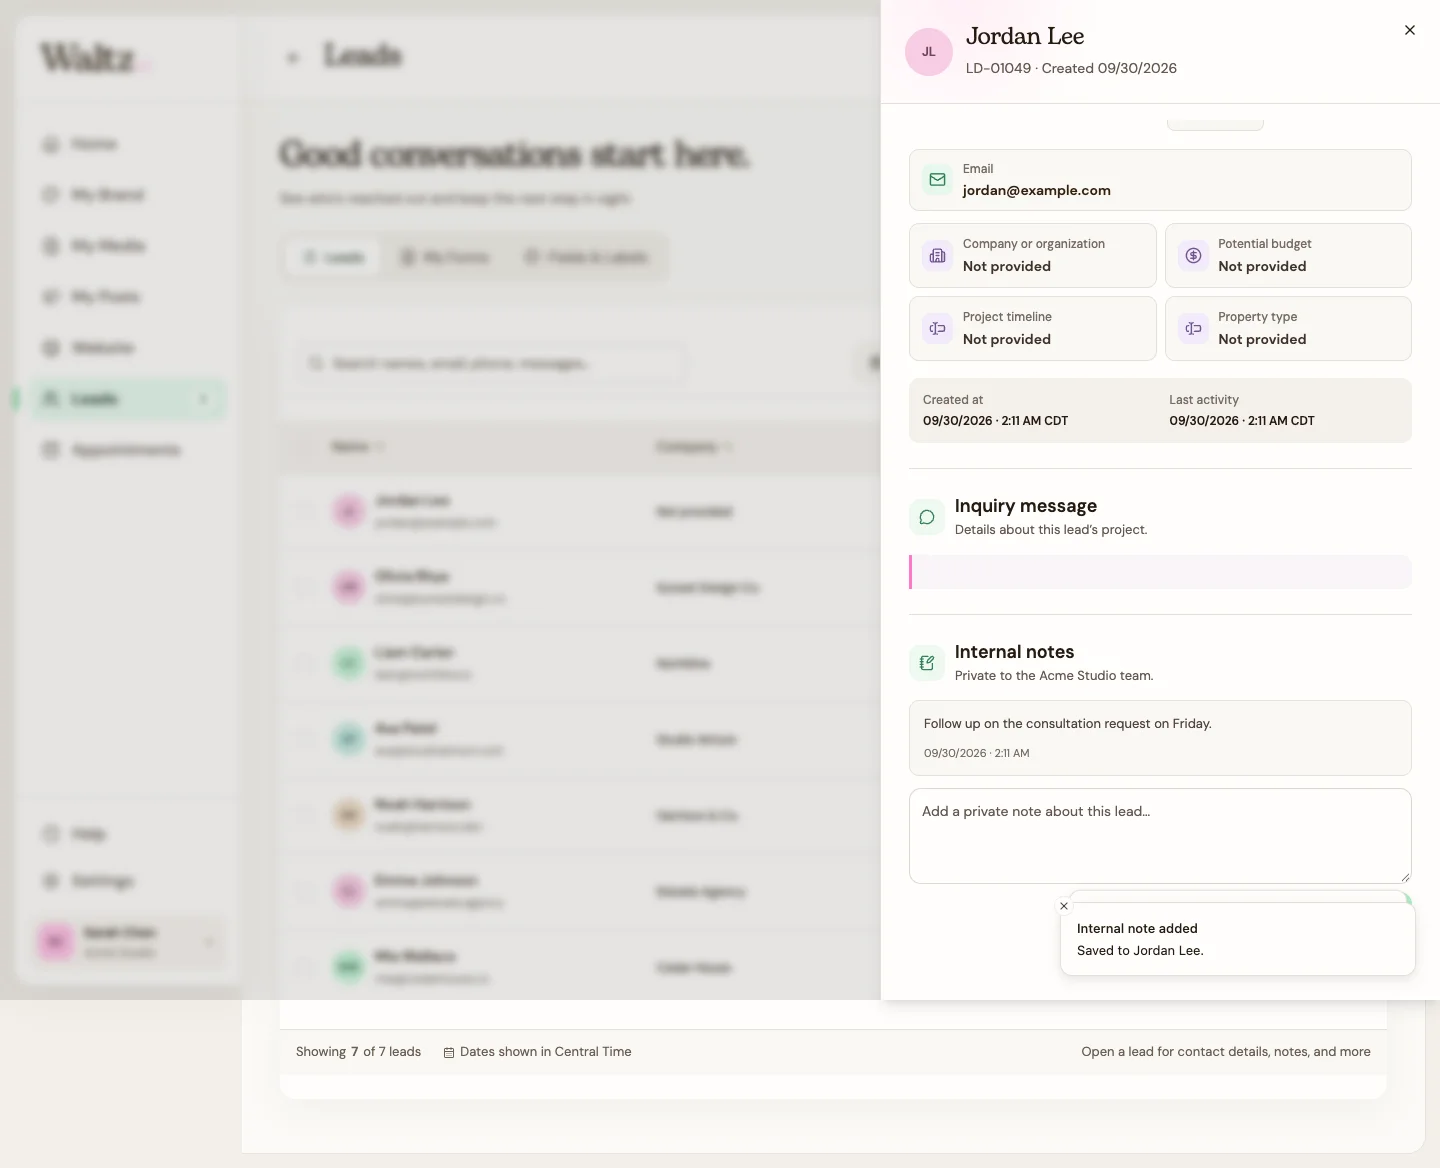
Add a private note with the agreed next step, such as “Send the proposal on Friday.” Choose Add note.
-
Use Edit lead details if a contact detail changes. For group updates, select leads and apply the appropriate status or label.
See the steps
Use these views to find the controls as you follow the guide.
What happens next
The lead has a clear status and a private record of what you need to do next.
Helpful tips
-
Labels describe useful groups, such as Referral or High priority. A status describes progress.
-
Contact shortcuts only appear when the corresponding contact detail exists.
-
A private note is a record, not an automatic reminder or a message to the customer.