
Where to go
Leads → Create lead
Before you start
Use a paid plan. First name, last name, and email are required in this dialog.
Step by step
-
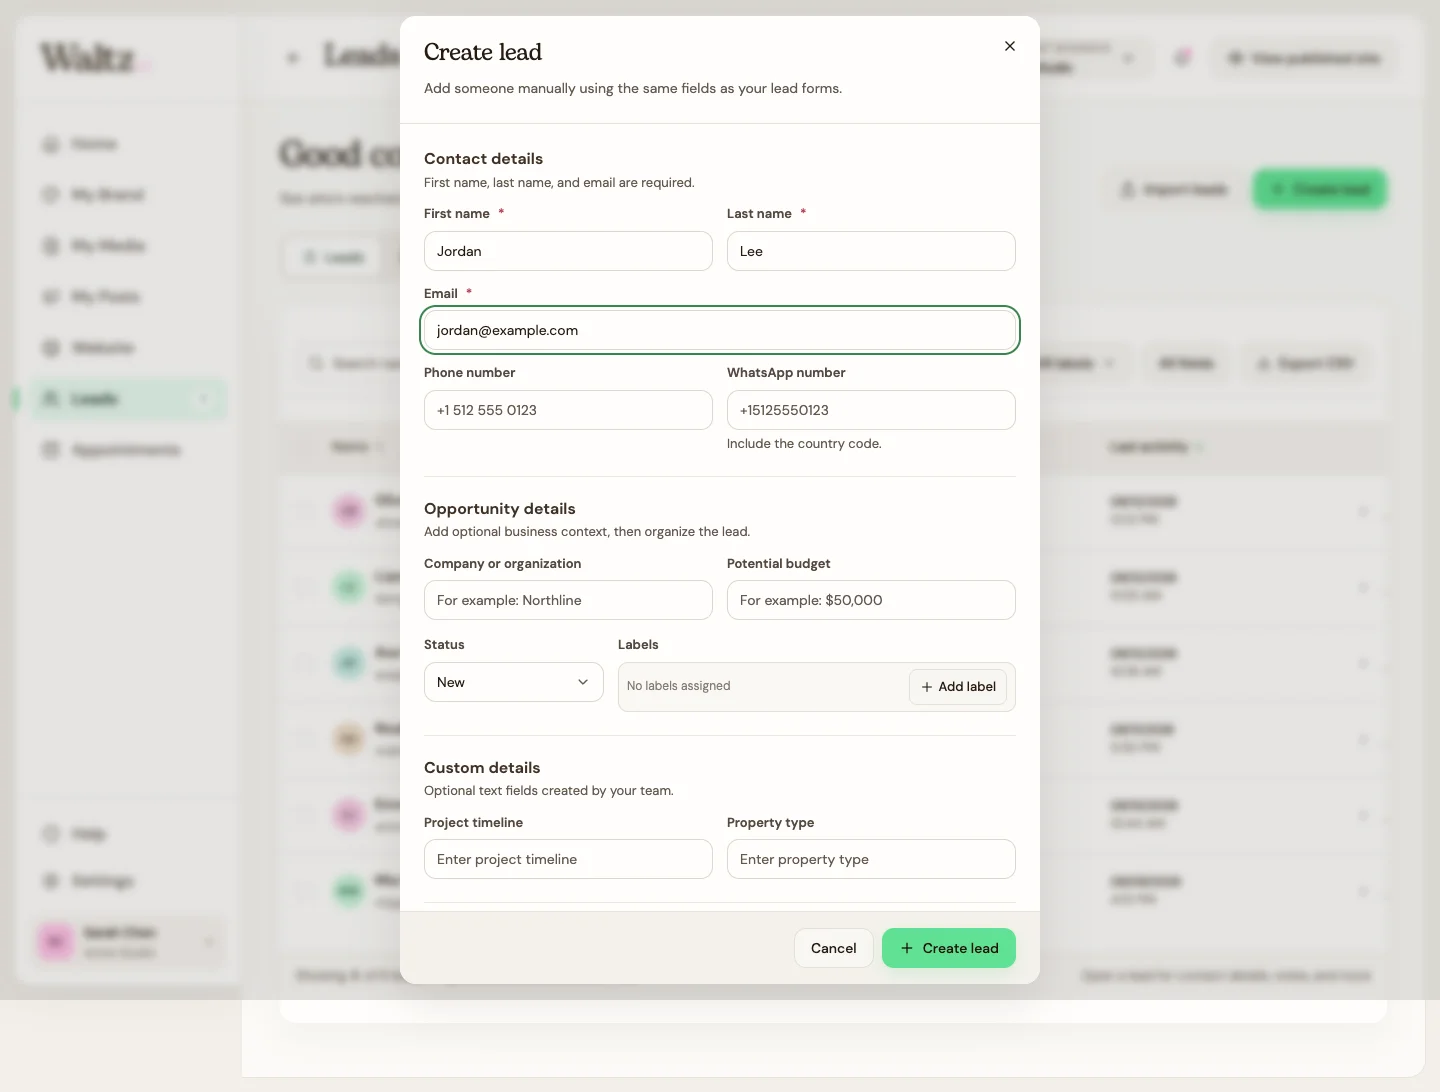
Choose Create lead. Enter the contact’s First name, Last name, and Email.
-
Add a phone or WhatsApp number if you have one. Include the country code so the contact shortcut points to the right person.
-
Optionally add the company, potential budget, labels, and named custom fields. Choose the status that matches the conversation so far.
-
Add the inquiry message or context, and a private note if you need to remember a next step.
-
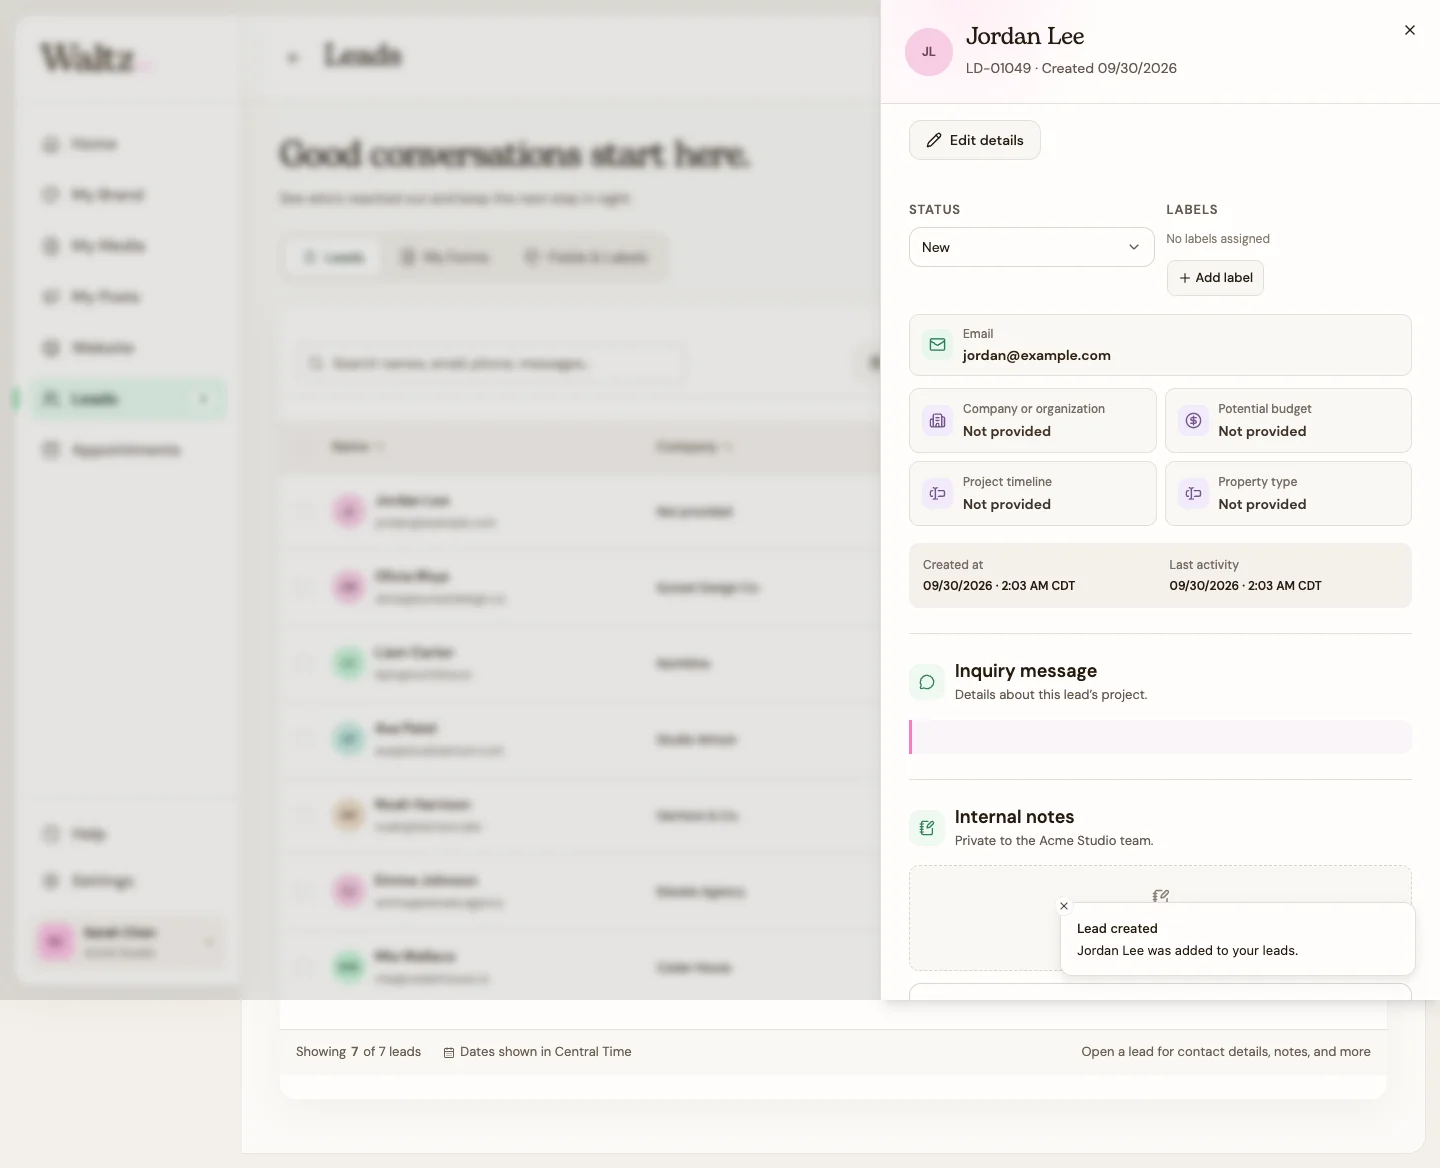
Choose Create lead. Open the new record and check the details before following up.
See the steps
Use these views to find the controls as you follow the guide.
What happens next
Your new contact appears in the Leads list and can be opened for follow-up.
Helpful tips
-
Manual entry requires a first name, last name, and email. File import has different requirements: only First name is mandatory.
-
Example: Jordan Lee, jordan@example.com, with a note to follow up about the consultation. Use your actual contact details when working with a customer.