
Where to go
My Posts → Image post
Before you start
Have the message, destination format, and optional images ready. Creating a post uses the My Posts image-post allowance.
Step by step
-
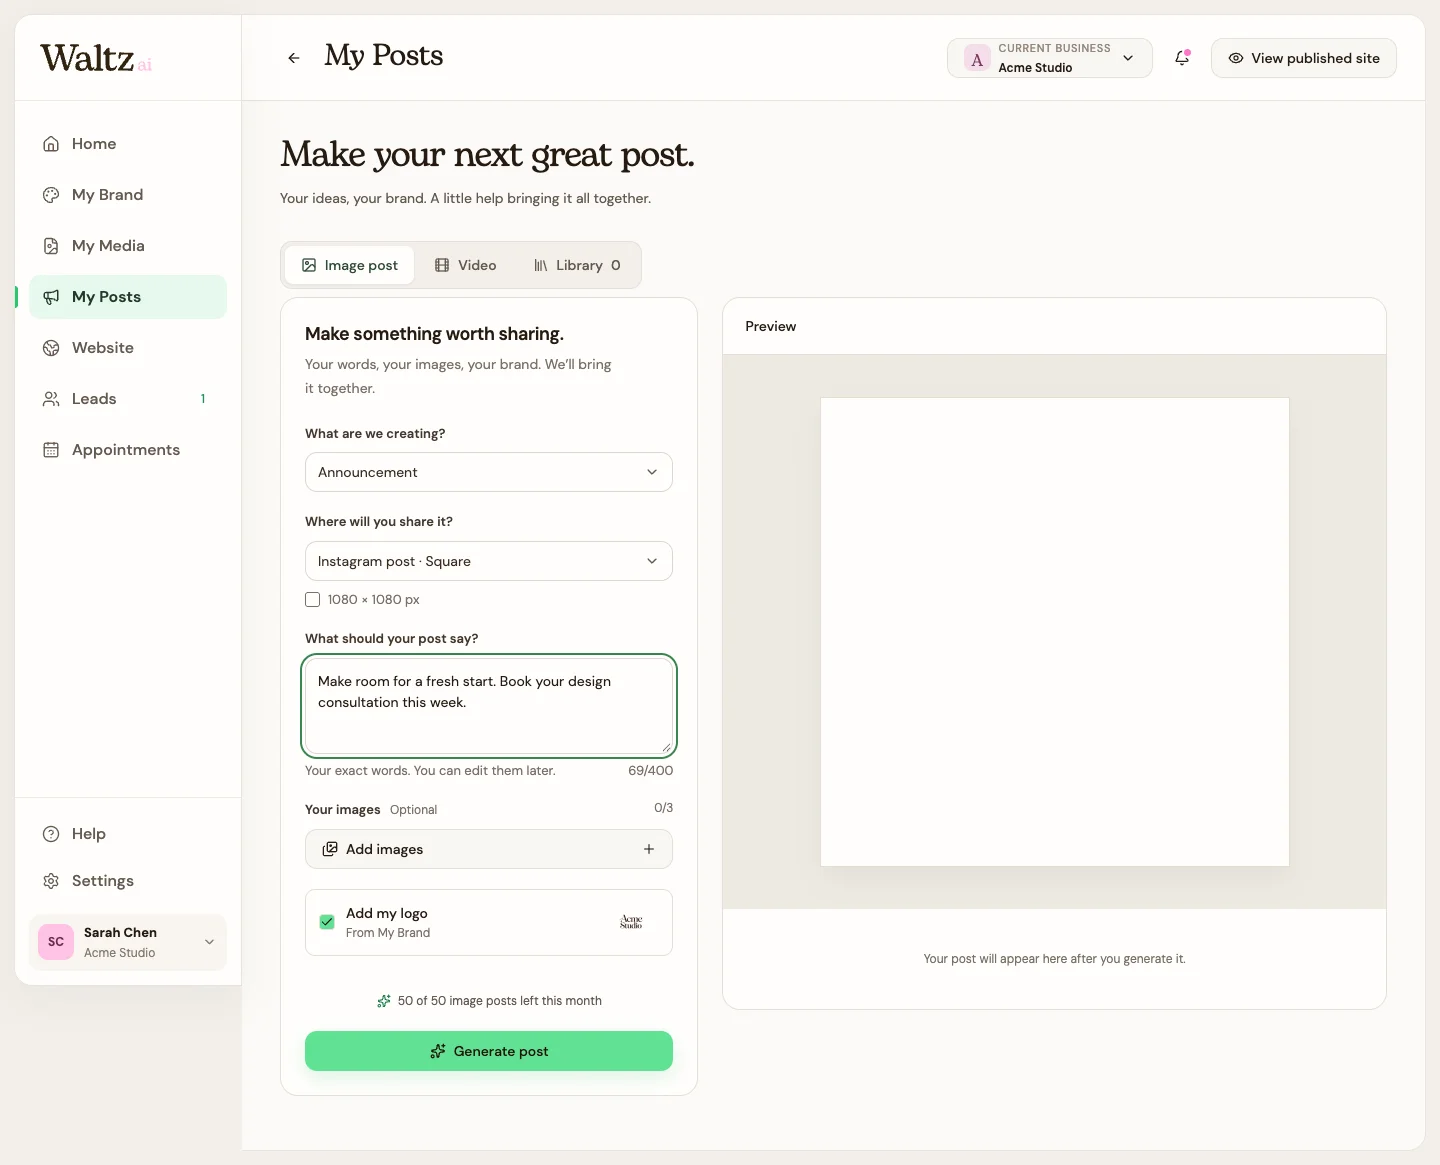
Choose Image post. Under What are we creating?, select Announcement, Offer or promotion, Product spotlight, or another suitable type. Choose Other for a custom brief.
-
Choose Where will you share it?. The menu includes Instagram, Facebook, Pinterest, LinkedIn, X, and YouTube thumbnail formats.
-
Enter What should your post say? using the words you want in the design. You have up to 400 characters.
-
Optionally choose Add images and select up to three. The first selected image is the cover. Review Add my logo.
-
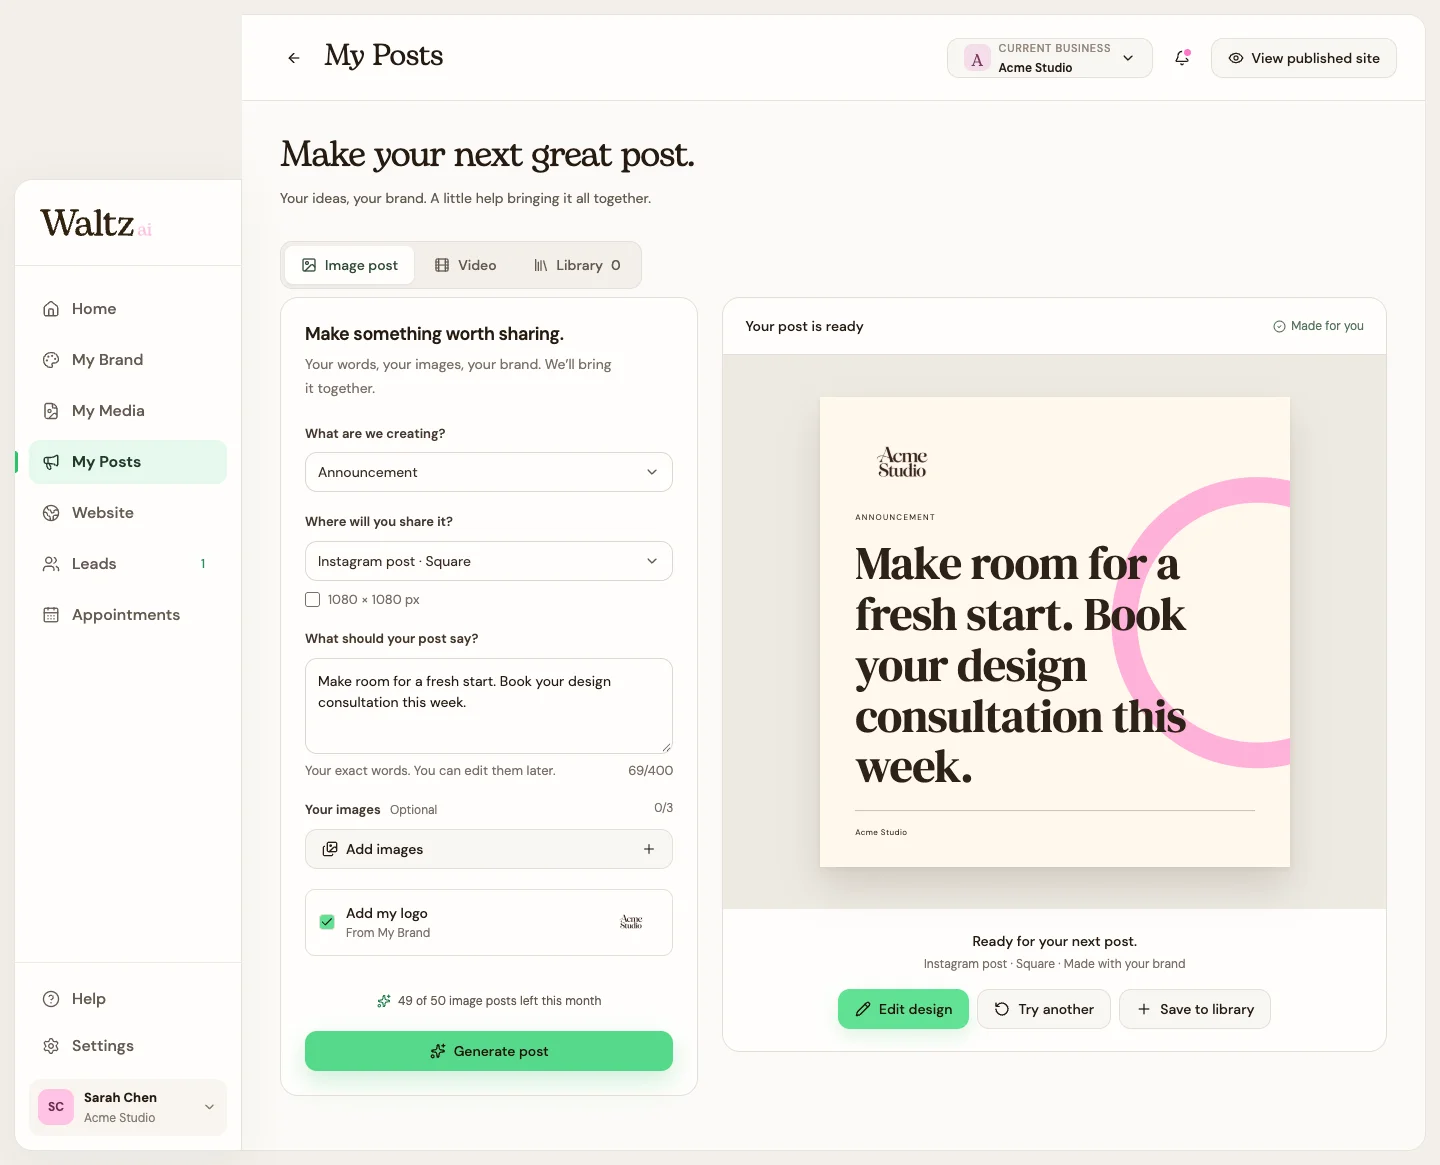
Choose Generate post. Review the result for spelling, details, image choice, and readability.
-
Choose Save to library to keep the creation. Open the saved post to edit it further if needed.
See the steps
Use these views to find the controls as you follow the guide.
What happens next
A reviewed post is saved in My Posts → Library.
Helpful tips
-
Example message: “Make room for a fresh start. Book your design consultation this week.”
-
Use your actual offer and dates. Generating again consumes another creation allowance.
-
Saving a post does not publish it to a social account.